Long Time – No Quest
So it seems as though I’ve given up on this blog. I really haven’t stopped making pinterest projects, but just forgot to tell you about them. Since it’s been so long, I’ll tell you about a project I did recently.
I’m sure you’ve seen people’s pins on renewing an old piece of furniture, often using the antiquing effect, or distressing. Upon research I discovered that there is actually a difference between the two. For my project I chose to distress. The main difference being: antiquing uses staining over a painted project to darken areas that would collect dirt and dust over the years, distressing is roughing up the surface in areas that would get the most use over the years. I wasn’t too concerned about antiquing since I liked the clean white look with some distressing.
I started with an old entertainment cupboard that I acquired from my grandparents. It used to house a record player and speakers.
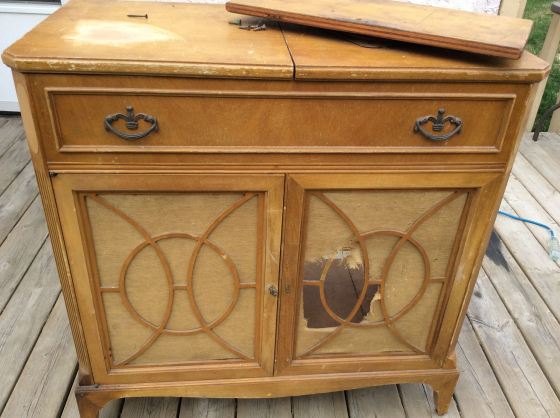
As you can see, it’s a little rough looking. The right door isn’t actually a door at all. This is where the speaker would sit and play the tunes without looking obtuse.
So I took to sanding the whole unit first. I later found out that this may not have been necessary. Many older pieces have had a protective substance applied that can be wiped off with a wet cloth if you let the water soak in for a bit. If a drop of water makes the surface turn white, this is likely what is on it. So you’d just want to wipe/scrape this off. I’ll know that for next time at least!
Here is what it looked like after I took off the broken pieces and sanded.

Not bad right?
The next day I applied a coat of blue/grey paint/primer mix. I wanted my distressed areas to show the blueish hue so as to imply that it was painted over the years. I read a blog that said you’re basically writing this piece of furniture a story, and I liked the thought of that.
Then I painted it with a white chalk paint. Now, you can buy this product at the hardware store and have it tinted to the allowed colours, OR you can make your own. If you know me, you know I’ll go for that! All you need is plaster of paris and your desired latex paint colour and mix it together. This way you can make any colour and have extra to use for another project. Keep in mind that with chalk paint, even the store-bought kind, you have to keep mixing throughout use since the chalky parts settle.
I let that dry completely, then did my distressing. To do this, all I did was take sand paper and rough up the areas that would have gotten worn down over the years. Generally on edges from rubbing up against it and around the hardware from opening and closing.
After this I applied a matte clear coat to protect it. You should apply either a clear coat or wax (this will give a yellowish tint) to chalk paint or it will scratch very easy.
I added the finishing touches and voila! The finished project. It actually only took me a few days of working on it. Mostly because of the drying time.


