Crate Coffee Table

Well, my next project is complete! Below is February’s pinquest.

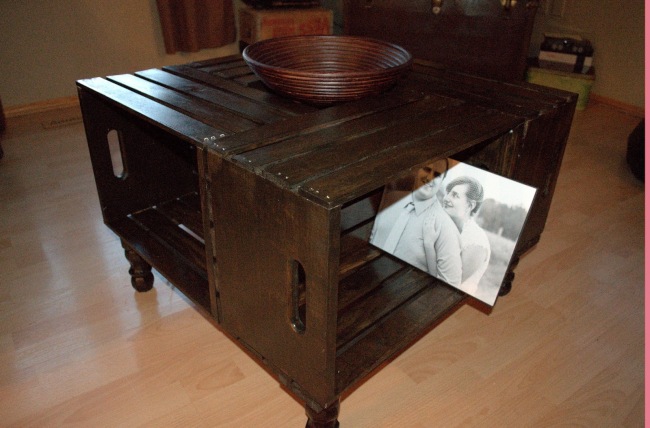
My husband has been wanting to get a coffee table recently and upon seeing retail price I decided that I didn’t want to pay that. So I thought I would just make my own instead of paying full price. I remembered something I had pinned once and thought that it was exactly what our living room needed. The original tutorial can be found at a blog by the name of Vintage Chic.

Image

What do you think? I mostly followed the tutorial. I did however decide to use dowling for the frame and not L-brackets (my husband said it would be easier), it’s not! USE THE L-BRACKETS!
Another thing the tutorial missed what the measurements for the pieces used in the frame. This does depend on the size of crates you find though. I got mine from Michaels and needed 2-3 1/2″ X 6 ft boards of pine cut into 2-27″ pieces, 3-20″ pieces and 2-8 1/4″ pieces. The frame ended up being a tad small, but we also had it cut at the store and the pieces weren’t exactly cut to the right lengths, so that may have had something to do with that.
Image
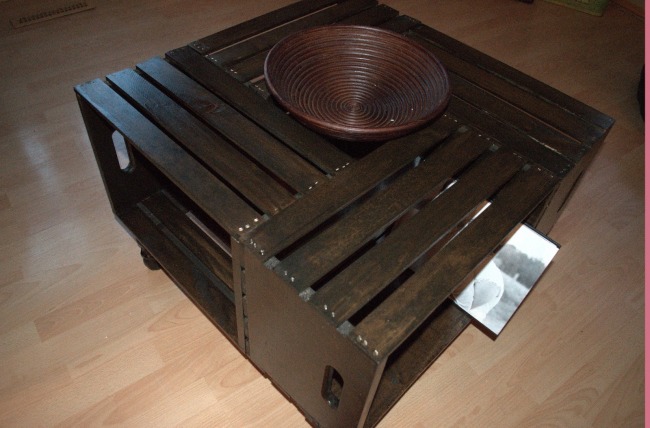
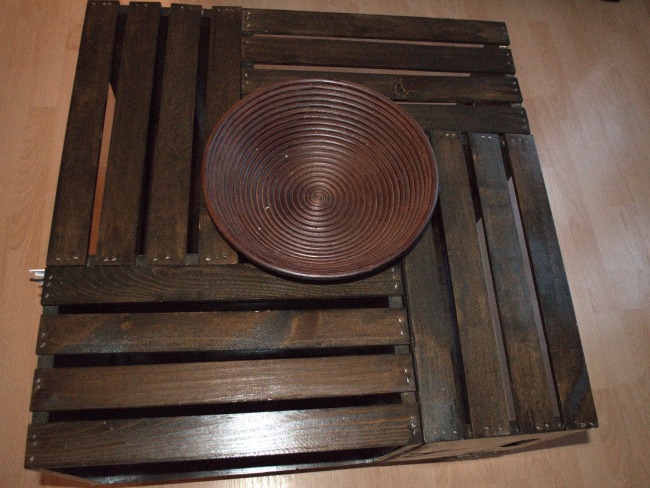
 All in all, the tutorial was great. I was able to follow it and make my own table without a problem. There are things you can customize as well, like the stain colour (don’t forget to clear coat if you don’t want your table ruined when something spills), I used legs instead of casters for my table, and I didn’t put images on the side of my crates though it does add a nice effect. In the tutorial she also filled the hole in the middle with a few boards and made it into a holder for stones, etc. I plan to do this in the future, but at the moment I put a bowl in it and that will do for now.
Image
So if you like this idea and have seen it on Pinterest before, go ahead and give it a try. It’s actually quite easy and looks great!

Butter-Pecan Sweet Potatoes

I pinned a recipe for sweet potatoes to see if I can find something else to replace my usual sweet potato fries. Below is the recipe and photo from All Things Simple.


Sounds delicious right? That’s what I though…but once I had made them I found they are actually rather plain. I wasn’t too impressed with this recipe. It is very similar to making the basic sweet potato fry, except you throw in some pecans and a little sugar.

As I was following the recipe I came to the instruction “Sprinkle with butter”. Now I don’t know about you, but I’ve never sprinkled butter before. So unfortunately, the butter ends up more in globs than anything and you have to stir it around to mix it over the potatoes. Then you’re supposed to add the brown sugar and pecans and put it in the oven to caramelize. It didn’t really do that, I could have just mixed them in and not thrown them in the oven again and would have had the same result.

All in all, the recipe tasted good, but I probably wouldn’t make it again. If you do want to try the recipe however, I would suggest maybe making them over the stove instead of the oven. Cook over low heat and covered, then when the potatoes are el dante add the butter, sugar and pecans and continue to cook until they’ve reached the desired tenderness.

Just for a little extra something, here’s the recipe I use to make sweet potato fries:

Cut into small strips 1-3 sweet potatoes (depends on how many fries you want)

Put them on a cookie sheet and sprinkle with olive oil. Stir them around a bit and make sure they have a little bit of oil on each fry. Season with seasoning salt.

Bake at 350 for 15-30 minutes (again, depending on how many you’ve made and how you like them, I like mine with no crunch so I cook them for quite a while)

Take out of the oven and there you have it, a healthy fry! I like to mix up some sour cream with sweet and spicy Thai sauce to dip in. Mmm…

Canvas Masterpiece

Well, this is my first post!
I’m backdating this project for my January project as I completed it in January but had not yet decided to start my PinQuest.
The following picture is what was posted to Pinterest from a blog namedVirginia & Charlie.
Her and I had two different takes on the project, but used the same medium. Puffy paint.
I didn’t use elmers glue because in my experience I knew that it didn’t dry as puffy as one would think. It generally flattens out after it dries. I may or may not know this from making glue pools in my metal elementary school desk and revelling in the experience of pulling them off as dried blobs. Don’t tell me I’m the only one??
Anyways, I decided to go with a white puffy paint. It’s a little more pricey than elmers glue, but if you want the pop up effect then this is my best suggestion. It had a tip perfect for the job, especially since I wanted fine details and small print. I did however go over it 2-3 times again, just to make it pop that much more.
I also decided to do my husband and I’s wedding vows on the canvas instead of just a design. Also, I did not paint onto wax paper and glue it on later. Instead, I drew my design directly on the canvas, made sure it was just the way I wanted, and then started to puffy paint over it.
The only problem with doing it this way is that if you do make a mistake in drawing the design, you will see that after you’ve painted because there won’t be puffy paint over it. I fixed this by doing a light coat of white acrylic paint over the entire canvas once the puff paint had dried. Spray paint would also work.
Another suggestion I’ve heard would be hot glue, and I strongly considered this, but decided against it. A hot glue gun would interfere with your ability to control what you were doing, as well as leave those oh so hated glue strings when you pull away. It would also require you to try and paint over it, which is also not an easy venture. So all in all, puffy paint (can be found at Wal-Mart and any craft store) is my suggestion.


The picture below is my completed project.

At the time I wasn’t sure where to put it so my husband walked over and put it on top of my antique type writer. I think he did well, what do you think?